


Last Updated By: Aidan Harveson, July 2025
Purpose: How to Add Department Codes to Copiers on a Windows Device
Process:
Please use this documentation for TMU-issued devices only. If you would like to print from a personal device, please contact the IT Service Desk.
1. Open your start menu and type in "Printers & Scanners". Then, Open "Printers & Scanners".

2. Select the copier you want to add a department code for and click on it. On the next page select Printer Properties

3. On the pop-up, go to the "Device Settings" tab. Click on "Settings", across from "User Department ID Management(J)".

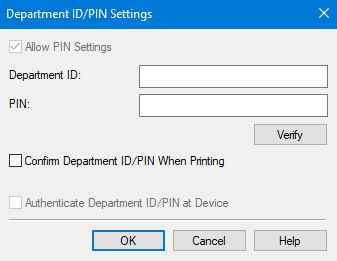
4. Type your department ID into the "Department ID" field. Leave the "PIN" field empty. Uncheck "Confirm Department ID/PIN When Printing". Click "OK".
5. Click "Apply" and then "OK". The department ID has been added to your copier.

